Sometimes, a braking system just requires a few miles’ use to regain its function after a winter lay-up. We strongly advise, though, that it’s visually inspected for fluid leaks and dodgy pipes and hoses before turning a wheel. If matters don’t rapidly improve or if a major fault becomes obvious, then the whole system should be fully checked over. It’s reasonable to assume that most classics have only had piecemeal repair over the years and its layup might have been the final straw.
Begin by raising the car on axle stands and probing the steel brake pipes for rust. Light surface rust can be gently wire-brushed and coated with grease or rustproofing wax – but if the metal’s pitted or flaky, the pipe will need renewal. Look closely at any copper pipes that may have been fitted: these are relatively soft and can easily chafe through if they’re rubbing against adjacent components or loose in their retaining clips. Check pipe union blocks, too – aluminium ones can turn to dust in extreme cases. Get an assistant to press the brake pedal while you feel for bulges in the flexible hoses. If the hoses are cracked or the metal ferrules are crusty, replace them.
The pedal should hold pressure indefinitely without sinking. If it sinks due to leakage, you should see fluid escaping from somewhere. If there’s no leakage, then suspect wear of the internal seals of the master cylinder. These can be replaced, but while it’s apart, check the cylinder’s internal surfaces for pitting and scoring.
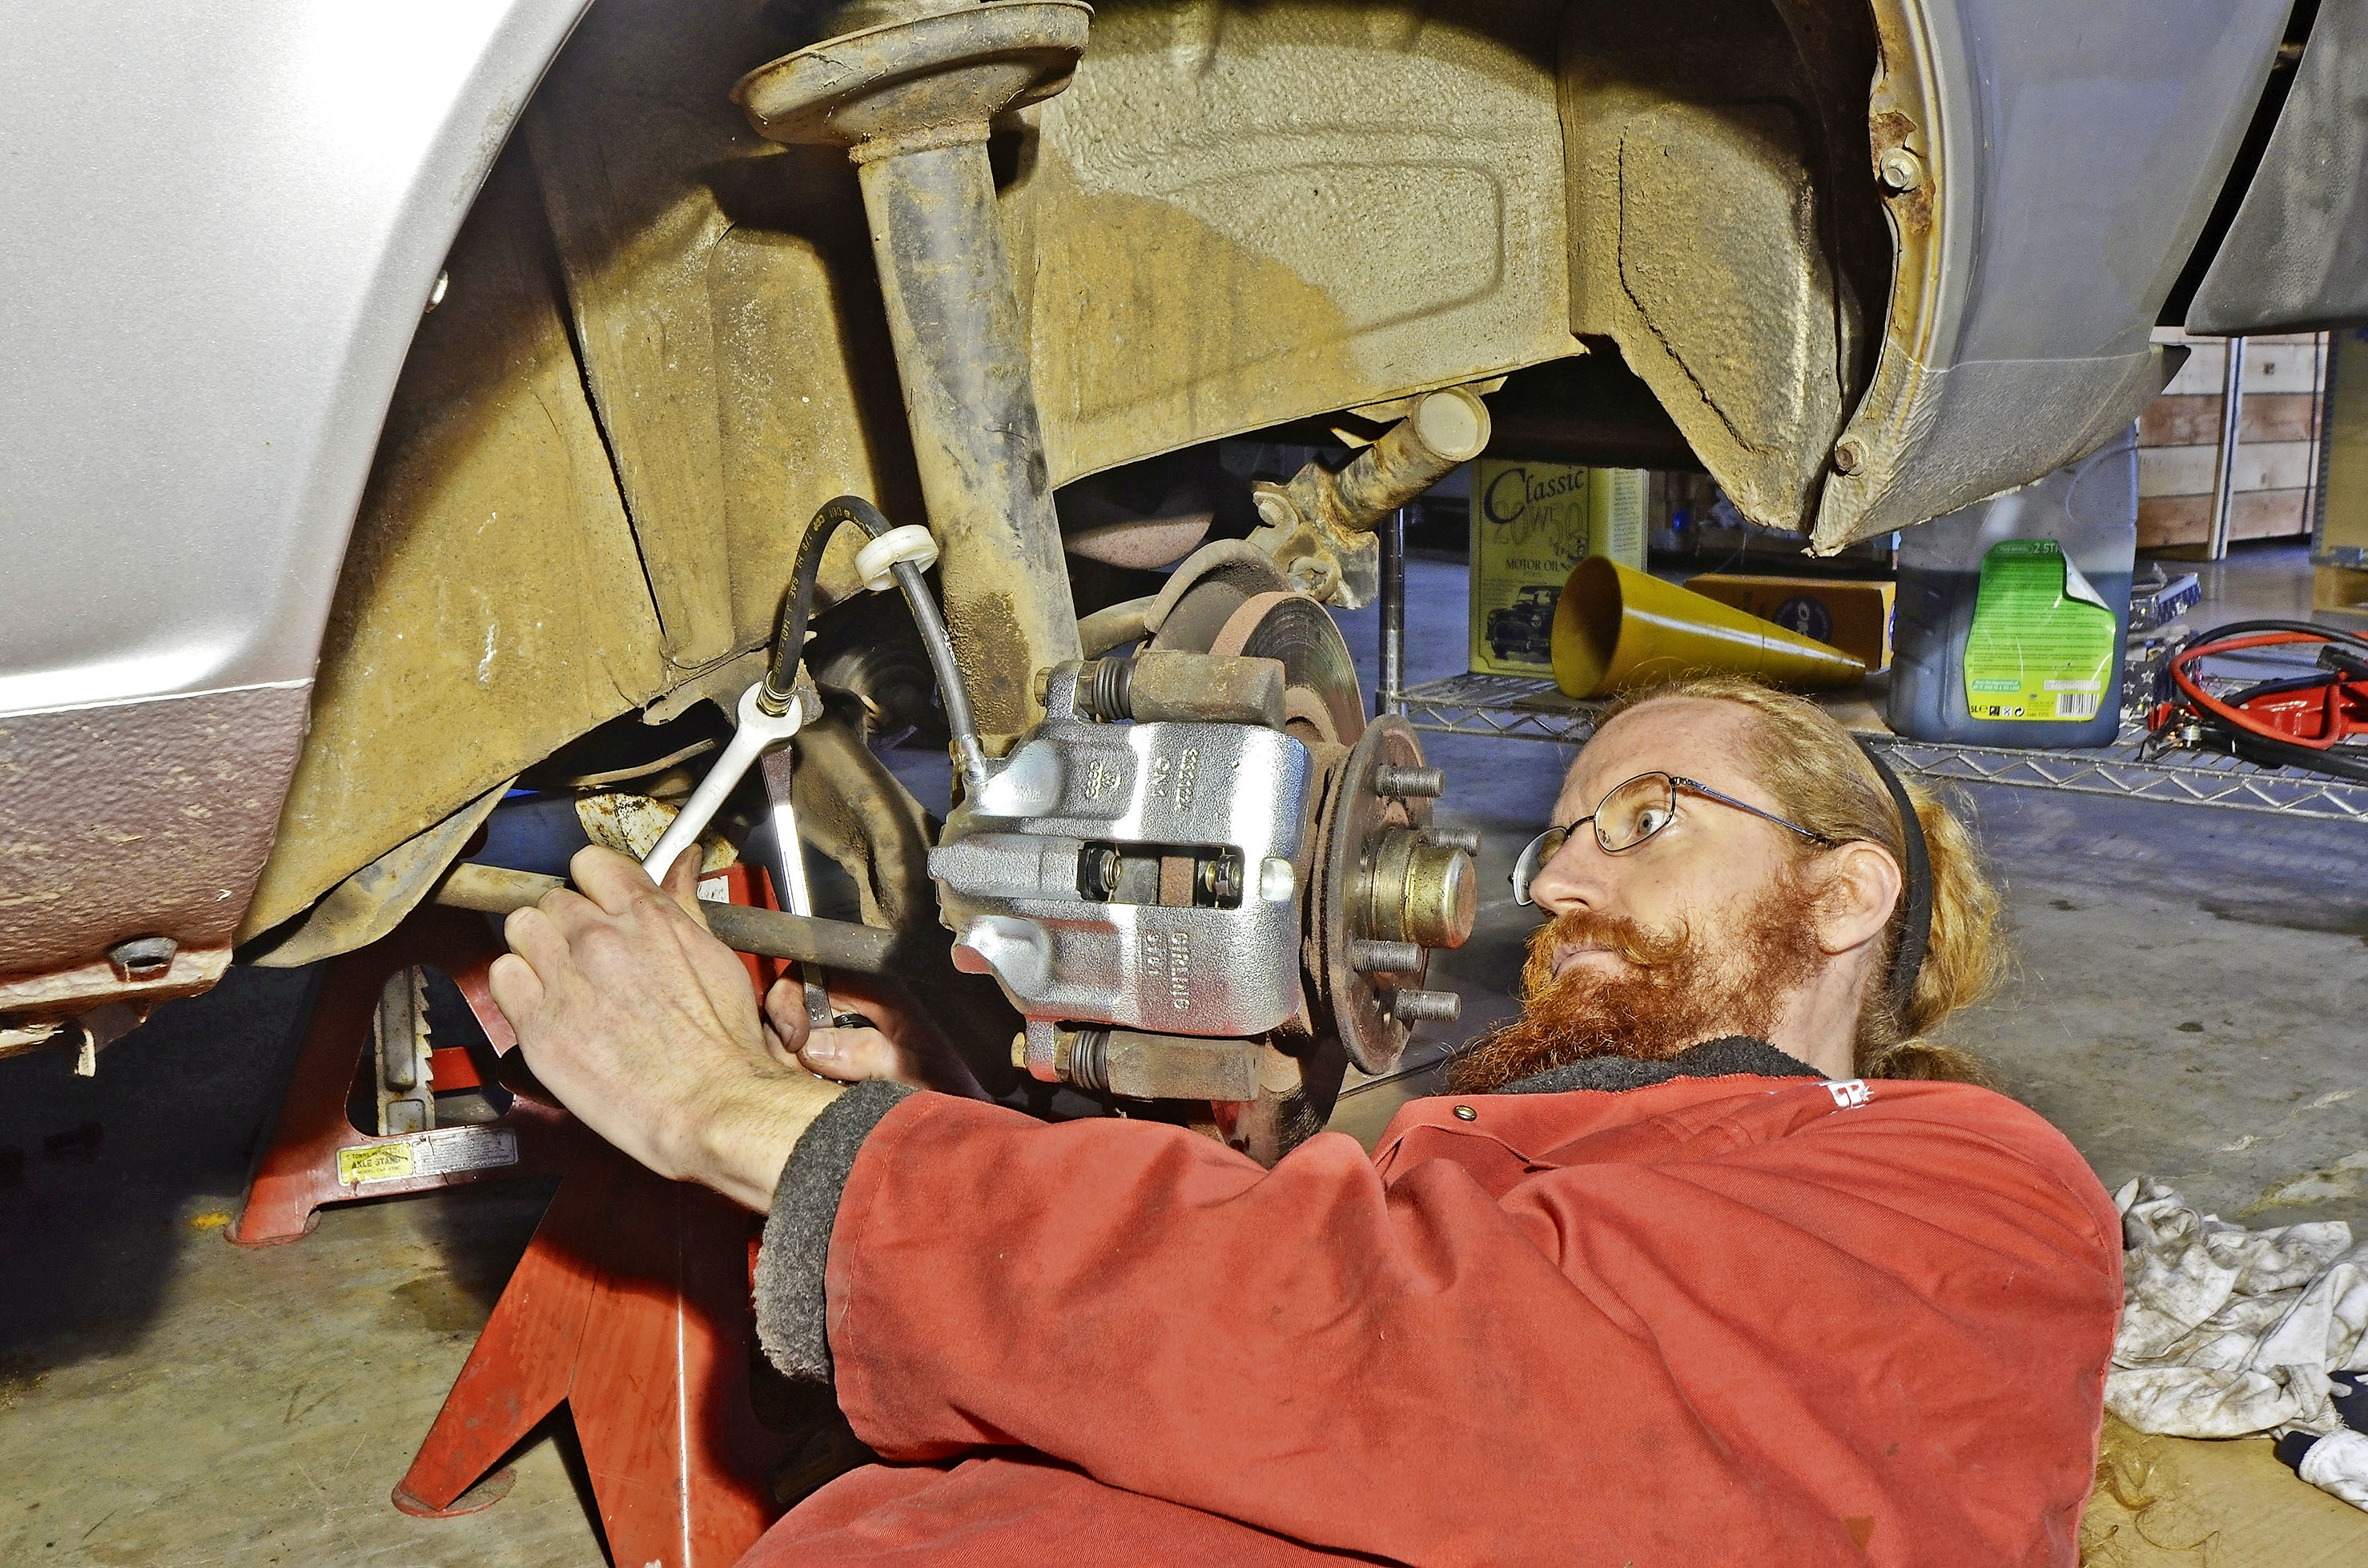
Remove each wheel in turn. Begin with the front disc brakes. Remove the brake pads. Modern ones use sintered iron in the friction material so can rust badly storage.
Press back the caliper pistons a little to check they’re free to move. Make sure the dust boots are intact and there are no fluid leaks. Lift the dust boot. If corrosion deposits are evident, strip and rebuild the caliper. Ensure ‘sliding’ calipers slide freely and their pins and rubber boots are in good order. Lubricate lightly with copper grease.
Check the discs for pitting, scoring and areas of rust or pick-up where the pads have welded themselves in position during storage. If there’s a rusty patch on the disc where the friction material’s been resting over winter, carefully rub it down with steel wool or emery cloth. You can use a dial gauge or a pencil taped to an axle stand to check the discs aren’t warped.
Remove the brake drums. Clean them and rub down rusty patches. Peel back the rubbers of the cylinders to check for leaks, then push the pistons back a little to check that they move and are not seized. If they are, rebuild or replace the cylinders. Check the linings are still firmly attached to the shoes and that there’s no oil or brake fluid contamination.
The easiest way to test a brake drum for warping is to turn the wheel with the handbrake just lightly applied. Any tight spots indicate the drum is out-of-round, though a small amount of distortion may not actually show up in the brake performance.
If you end up with a major hydraulic overhaul on your hands, then consider putting silicone brake fluid in the rebuilt system. This eliminates many of the damp-related problems caused by standing over winter. For the most long-lasting result, change the seals of the master cylinder and brake calipers, renew rear cylinders and fit new flexi-hoses all round. Change steel pipework for copper and renew any crusty unions and bleed nipples.
I am replacing the brake components on an MGTD. I notice that on the back brake cylinders they are held in pllace by the bolt that goes through the banjo fitting. I have tightened them but there is still some movement of the cylinder in the brake plate. Is this normal? Thank you for your excellent videos!